
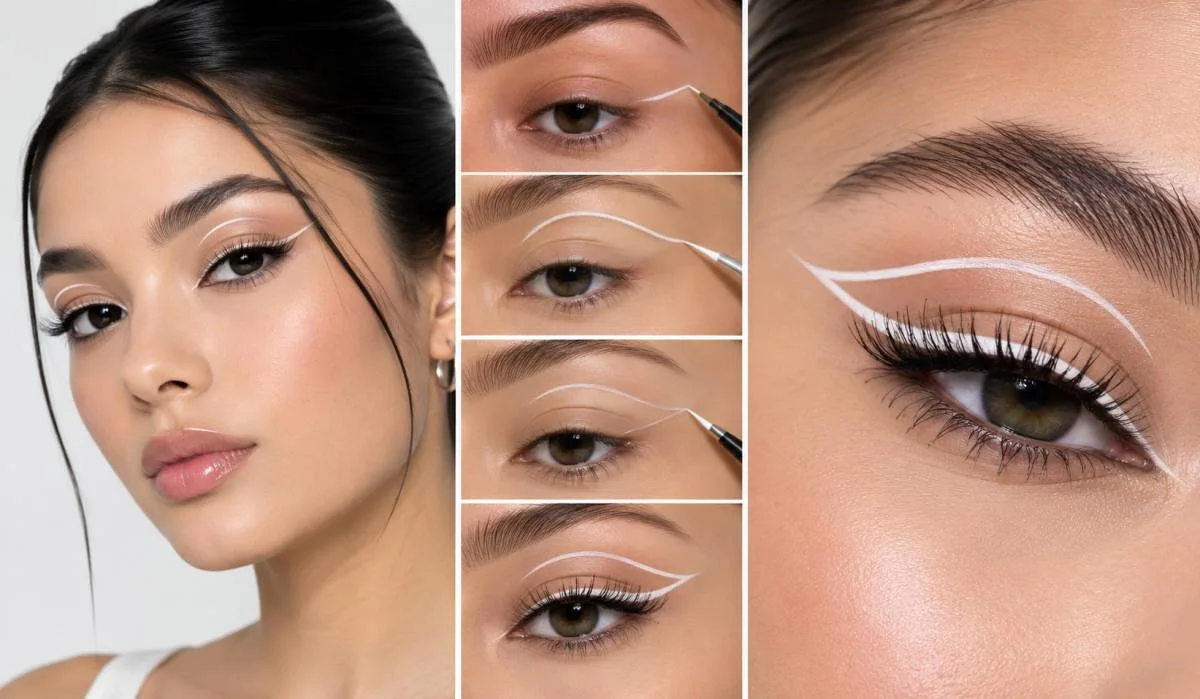
Graphic eyeliner looks hard, it is not, the best graphic looks are the simplest, one floating line above the crease, two dots at the inner corner, a single stripe under the brow, no wing needed, no steady hand needed, just placement. I started two years back, my first attempt was a mess, lines going everywhere, then I learned the trick, tape, and going slow, now I do a floating line in four minutes.
This graphic eyeliner tutorial is for beginners, three easy looks first, then tools, palettes, and holographic liner, no Instagram-level skill needed, just steps that work on a real face.
What Makes Eyeliner Graphic?
Simple answer. It does not follow the lash line.
- A wing follows the lash line and flicks out. Graphic liner goes somewhere else. Above the crease. Below the brow. Along the lower lash line. Around the eye. In shapes.
- The other thing. Colour. Graphic liner is usually not black. White. Silver. Neon green. Blue. Red. Holographic. The colour is part of the look.
- And negative space. Graphic looks often leave gaps. A line with a gap. A half circle. A stripe that stops in the middle. The gap is the design.
Read More: Snail Mucin Routine for Beginners: Simple Steps for Glow
Best Graphic Eyeliner Tutorial for Beginners
Start with these three looks. Do them five times each before trying anything else.
Look 1. The Floating Line
This is the easiest graphic look there is. A single line above your natural crease. Floating. Not touching the lash line.
How to do it?
- Look straight into the mirror. Find your crease. Now go slightly above it. That is where the line goes.
- Draw a small line from the inner part of the crease. Not the inner corner. Start a bit outward. Extend it toward the outer corner. Stop before the end.
- Make it thin. Thin lines look intentional. Thick lines look messy.
- That is it. One line. No wing. No lash line liner. Just the floating line.
- Add mascara done.
This is the look I would recommend for anyone's first attempt. It is forgiving. If the line is slightly uneven, nobody notices. Because there is nothing to compare it to.
Look 2. The Double Line
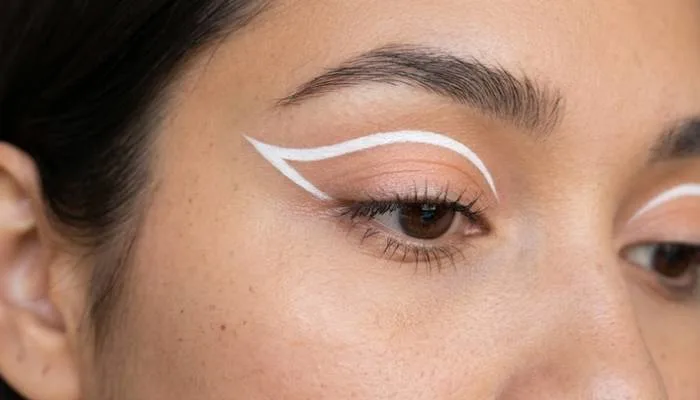
Two lines. One on the lash line. One above the crease. Parallel. Same colour.
How to do it?
- Draw a normal thin line on the upper lash line. No wing. Just the lash line.
- Now draw a second line above the crease. Same length. Parallel to the first.
- Both lines in the same colour. White is best for beginners. Or silver.
- The gap between the two lines is the design. Do not fill it. Leave it bare.
This looks more complicated than it is. It is just two straight lines.
Look 3. The Inner Corner Stripe
A single stripe at the inner corner. Going up. Not out.
How to do it?
- Start at the inner corner of the eye. Draw a short vertical line. Going up toward the brow. About a centimetre long.
- That is the whole look.
- It opens the eye. It looks modern. And it takes twenty seconds.
- Use white or silver for this one. Black is too harsh.
Graphic Eyeliner Tutorial for Beginners Step by Step
Follow this order for any graphic look.
- Step 1. Clean the eye. No moisturiser on the lid.
- Step 2. Apply a light eyeshadow base. Nude or white. This makes the liner colour pop and gives it something to grip.
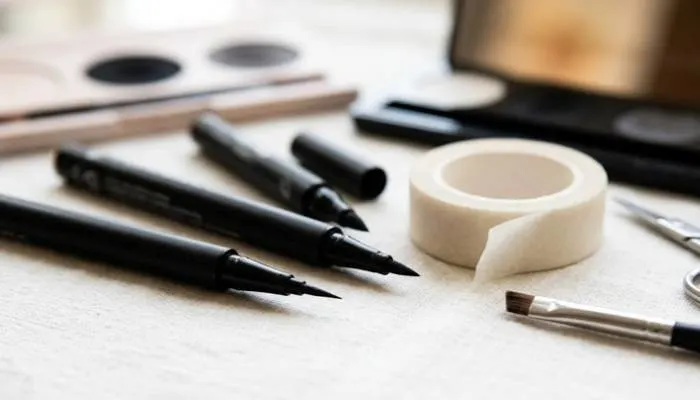
- Step 3. Use tape if needed. Place a small piece where you want the line to end. Draw along the edge. Peel off after.
- Step 4. Draw with the eye open. Not closed. Graphic lines look different when the eye opens. Always check with the eye open.
- Step 5. Work slowly. Graphic liner is not a speed game. Slow hand, clean line.
- Step 6. Fix mistakes with a cotton bud and micellar water. Not with more liner.
- Step 7. Let it dry fully before adding anything else. Especially with liquid formulas.
- Step 8. Add mascara last. Not before. Mascara on the lashes can smudge wet liner.
Do the same look on both eyes. Draw one step on the left. Then the same step on the right. Then move to the next step. This keeps them even.
Easy Graphic Eyeliner Tutorial for Beginners
If the three looks above feel like too much, here is the easiest version.
One dot.
- Take white liner. Put a single dot in the inner corner of each eye.
- That is it. That is graphic liner.
- It looks like you did something. It takes five seconds. Nobody can mess it up.
- Then move up. Two dots. Then a short line. Then a floating line.
- Small steps. That is how you learn.
- Another easy one. A single line under the lower lash line. Not on the waterline. Below it. A thin white or silver line.
This is called the "under line" look. Very easy. Very modern. Takes one minute.
Graphic Eyeliner Palette
You do not need a palette, You need three liners, White, Black, One colour you love, Silver, blue, or green, That covers most graphic looks
But if you want a palette, look for these.
- Waterproof formulas. Graphic liner must not smudge. Waterproof or transfer proof.
- Fine tip applicators. Thin brushes or felt tips. Thick brushes cannot draw thin lines.
- Good pigment. Cheap white liner is watery. It takes three coats to show. Good white is opaque in one.
- A mixing medium. Some palettes come with a liquid you mix with powder. This lets you make any colour into liner. Useful but not needed for beginners.
- Brands to check in India. MyGlamm, SUGAR, Swiss Beauty, and NYX have decent graphic liner options. Mars has affordable ones too. Read reviews before buying. Some cheap liners crack after two hours.
One tip. Buy a white liner first. White is the most useful colour in graphic liner. It shows on any skin tone. It works for dots, lines, and inner corner. Black you already have.
Holographic Eyeliner
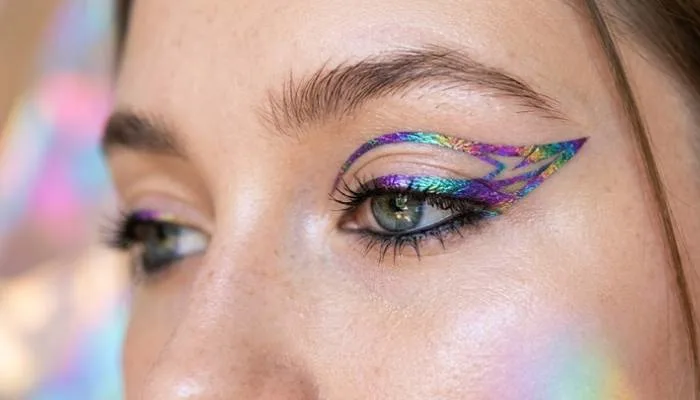
This is the fun one. Holographic liner changes colour in light. Silver to pink to blue. It is not a solid colour. It shifts.
How to use it.
- Holographic liner works best as an accent. Not as a full line.
- Use it for the floating line. Or the inner corner dot. Or a thin line under the brow.
- Do not use it on the whole lid. Too much. Looks like a craft project.
- Do not use it in daylight. Holographic needs light to show the effect. In office lighting it looks grey.
- Pair it with simple makeup. Nude lid. Mascara. Holographic floating line. That is the look.
- Where to buy. Holographic liner is harder to find in India. Check online stores. Some indie brands make it. Also check Nykaa and Amazon. Read reviews. Cheap holographic liner is often just glitter with a colour shift that does not show.
One warning. Holographic liner can irritate the eye. Patch test first. Especially if you have sensitive eyes.
You May Also Read: Homemade Beauty Treatments for Face: Easy DIY Skincare
Common Mistakes
- Drawing with the eye closed. The line moves when you open. Always check with the eye open.
- Going too thick. Graphic liner is about thin clean lines. Thick lines look like a mistake.
- Not using tape. Tape is not cheating. It is a tool. Use it.
- Fixing with more liner. It gets worse. Cotton bud. Micellar water. Start again.
- Skipping the base. Liner fades fast on bare skin. Use a light shadow base first.
- Rushing. Graphic liner takes time. Do it when you are not late.
- Matching both eyes perfectly. They will not match perfectly. Nobody's do. Stop checking. Step back from the mirror. At arm's length, small differences disappear.
Quick Table
| Look | Difficulty | Time |
|---|---|---|
| Inner corner dot | Easy | 10 sec |
| Inner corner stripe | Easy | 30 sec |
| Under line | Easy | 1 min |
| Floating line | Easy | 2 min |
| Double line | Medium | 4 min |
| Holographic accent | Medium | 3 min |
Last Thing
Start with one dot, then one line, then two lines, do not attempt the Instagram looks on day one, those take practice, white liner first, tape second, patience third, and remember, graphic liner is supposed to look a little bold, if it feels like too much, it is probably right, if it feels like nothing, add one more line.
FAQs
1. What is the easiest graphic eyeliner for beginners?
A single dot in the inner corner. Then a floating line above the crease. Both need no wing skill.
2. What tools do I need for graphic eyeliner?
A fine tip liquid liner. White, black, and one colour. Tape. Cotton buds. That is enough.
3. Do I need a graphic eyeliner palette?
No. Three liners cover most looks. A palette is optional.
4. What is holographic eyeliner?
Liner that shifts colour in light. Silver to pink to blue. Best used as an accent, not a full line.
5. Can I do graphic eyeliner with eyeshadow?
Yes. Wet an angled brush. Dip in shadow. Draw the same shapes. Easier to fix than liquid.
6. How do I make both eyes match?
Do each step on both eyes before moving to the next step. Do not finish one eye first. And step back from the mirror. Close up, everything looks uneven. At arm's length, it does not.